Floating shelf bracket instructionsDrill, recess, slide on.
Everything you need to hang a Walnut Wood Works bracket: mounting it to the wall, drilling the shelf, and getting a flush, floating fit. Built so even a first-time DIYer can do it.

What you'll need.
- Your bracketwith the included #10–12 × 2½″ wood screws
- A drillwith a ½″ chuck, plus a driver bit for the screws
- A stud finder and levelstuds give you the full weight rating
- The right bitour Drill Guide Kit, or a drill press with a 13/16″ (20 mm) bit
- A routerto recess the backplate; the Router Guide Kit makes it simple
- Optionalanchors for drywall or masonry, construction adhesive
Mount the bracket to the wall.
Our brackets are best mounted in studs, which dramatically increases how much weight they'll hold. Plan the bracket around your studs first; you'll lay out the shelf holes to match it in step 2.
Wood studs or blocking
For the most strength, mount to a wood surface: directly to studs or to blocking. Use the included #10–12 × 2½″ wood screws.
Drywall only
You can mount with drywall anchors, but the weight capacity then depends entirely on the rating of the anchors you choose.
Tile
On new tile, install the bracket first and tile around it. On existing tile, cut out just enough space for the bracket with an angle grinder.
Stone or masonry
Use concrete or stone anchors, just as you'd mount anything else to stone, and follow the anchor maker's instructions.

- Use the slots. The mounting slots let you slide the bracket side to side onto your studs. It's strongest with the screws as close to the support rods as possible.
- More screws, more support. For extra support, more screws is always better than fewer.
- Need a hole somewhere else? Drill one through the plate with a 3/16″ bit.
Mount these to blocking in the wall for maximum capacity.
Most customers mount right over the drywall and that works, but it isn't ideal: drywall can compress under a loaded shelf and cause some minor sag.
Trace the bracket on the wall and cut away that strip of drywall. Replace it with a piece of ½″ hardwood or plywood, so you have a solid surface to mount the bracket to. It's not as good as blocking, but it's much better than mounting over drywall or straight to the exposed studs. Add Liquid Nails behind the bracket for the ultimate install.
Mark and drill the shelf.
With the bracket on the wall, measure for the holes in your shelf. Having the bracket a little off-center in the shelf is generally fine unless the offset is extreme.
Walls are rarely perfectly flat, and the bracket forms to the wall when it's installed, which can make the outer tips of the rods splay in or out. Don't measure the tips to lay out your holes. Use the center-to-center spacing below instead. The rod ends can flex a little, but the back of each rod is welded into the backplate and can't move.
- Set the shelf on top of the mounted bracket, in its final position.
- Mark the center of one rod on the back edge of the shelf.
- Use the drilling templates below to mark the centers of the other holes. Measure center to center, never off the rod tips.
- Drill each hole straight and square into the back of the shelf.
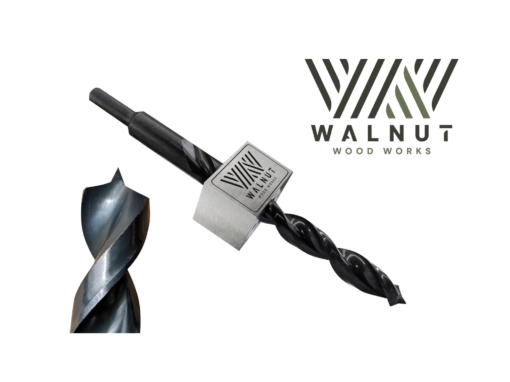
It comes with a custom-made drill bit and a matching guide, so your mounting holes come out straight, square and perfectly placed every time.
- Our drill bits are extra long and sized for a perfect fit: slightly larger than the rod, but still small enough for a good, tight fit. They work in any hand drill with a ½″ chuck.
- No kit? You'll need a drill press. We recommend a 13/16″ or 20 mm bit for all brackets with ¾″ rods.
Recess the plate, slide it on.
Rout a shallow slot in the back of the shelf so the backplate sits flush. That's what lets the shelf close tight to the wall and makes the bracket completely invisible.
- Slide it home. Push the shelf over the rods until it sits tight against the wall.
- Want it permanent? Apply construction adhesive to the rods before you slide the shelf on.
- Or pin it. Drill up through the underside of the shelf into a rod and drive a screw.

How thick does the shelf need to be?
Heavy Duty
1¾″ and upThe 1½″ backplate recesses into the back of the shelf, so the shelf needs to be at least 1¾″ thick to hide it.
Slim-Line
1½″ and upA shorter 1¼″ backplate, so shelves down to 1½″ thick still hide it completely.
Super Duty
1″ and upThe plate screws to the side of a stud inside the wall, and the rod runs out through the drywall, so only the rod enters the shelf. It works at any thickness from 1″ up, and it's the best and strongest option for shelves under 1½″.
Drawn to scale, from the side. Shown on a 12″ deep shelf.
Rod spacing, by bracket length.
Pick your bracket length. Measure every hole from the center of the first rod you marked. All dimensions are center to center.
12″ bracket
- Rods
- 2 × ¾″
- Rod spacing
- 9¾″
- Plate
- 11.5″ long
18″ bracket
- Rods
- 2 × ¾″
- Rod spacing
- 13″
- End slots
- 15½″ apart
- Plate
- 17″ long
24″ bracket
- Rods
- 2 × ¾″
- Rod spacing
- 19½″
- End slots
- 21⅝″ apart
- Plate
- 23″ long
32″ bracket
- Rods
- 3 × ¾″
- Rod spacing
- 13″ + 13″
- End slots
- 29″ apart
- Plate
- 31.25″ long
43″ bracket
- Rods
- 3 × ¾″
- Rod spacing
- 19½″ + 19½″
- End slots
- 41″ apart
- Plate
- 42.5″ long
rod holes (drill these into the shelf) mounting slots (screws into the wall)

Made right here in Bell Buckle.
Made from raw cold-rolled American steel, meticulously cut, drilled, ground, welded and packaged in Bell Buckle, Tennessee. Every bracket carries a lifetime warranty.